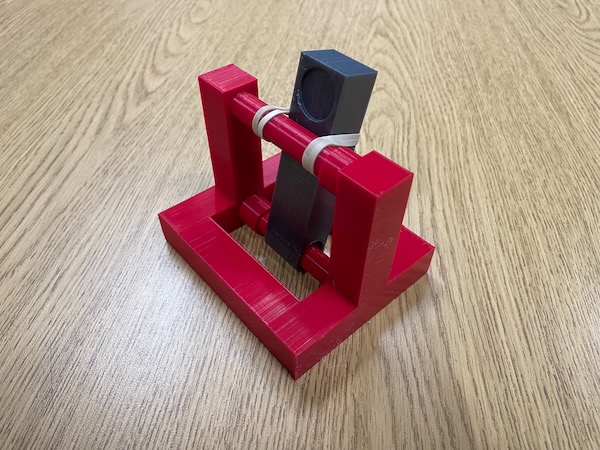
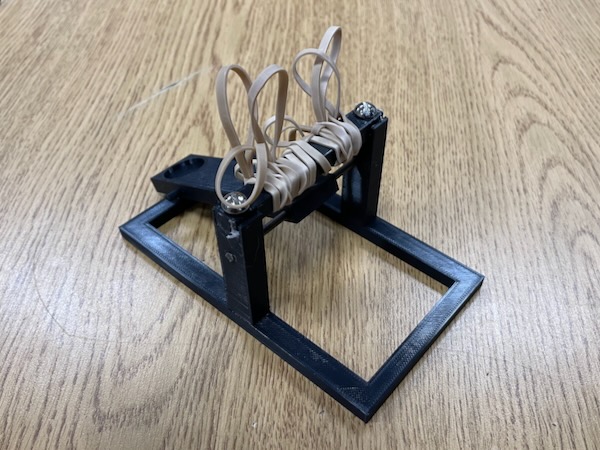
Fostering practical skills is key. My High School Principles of Engineering class begins with an introductory project that merges creativity, precision, and problem-solving: 3D-printed penny catapults. This project is designed to introduce or rekindle students' 3D modeling skills, the nuance of measuring with a caliper, and encourage them to think critically about how different parts interact within a mechanical system.
Design and Iteration
As students begin to design their catapults, they start by collecting data such as the dimensions of a penny, before sketching out several concepts, before progress to making a model out of chipboard and hot glue. Once they present their prototype to me, then they begin to 3D model each part of the catapult, from the base to the arm. I find having the chipboard prototype in hand allows me to point and discuss it easily with the students to make a plan for how to 3D model it. For instance, the hole for the 1/8-inch metal rod might not fit perfectly on the first try. Students must measure their printed parts and adjust their 3D models to achieve a perfect fit, demonstrating the iterative nature of engineering design.

Considering The Materials
Working with rubber bands introduces another layer of complexity. Students must ensure the rubber bands interact gently with the catapult to avoid sharp edges on 3D-printed parts from damaging the bands. Utilizing tools like fillet or creating rounded surfaces helps achieve this, highlighting the importance of considering material properties in design.
To understand the forces at play, students use force probes or spring scales to measure the rubber band's tension at different ranges of pull. They discover that there's a yield point where the force no longer increases proportionally with the band's stretch. I also provide them with example 3D printed bars of different thicknesses/widths to bend with their hands. This hands-on exploration of force and elasticity adds depth to their understanding of mechanical principles.
Managing materials is a crucial part of the project. For the metal axle, students typically use less than six inches each, with scrap pieces often repurposed by their peers. Rubber bands are limited to around six per student, with options including #32 and #64 sizes. For testing, a dozen pennies are provided to each class, encouraging students to use them judiciously. Looking at the examples of student catapults you can see that some students do not even use the metal rod; some students even use bolts.
The most impactful constraint is on the 3D printing material. The finished, assembled catapult must fit within a six-inch cube, with a variable gram restriction on the total weight. Typically, 200 grams is more than enough, but this can be adjusted based on the group's needs, ranging from 125 to 250 grams. This constraint teaches students to think critically about material efficiency in their designs.
Testing and Competition
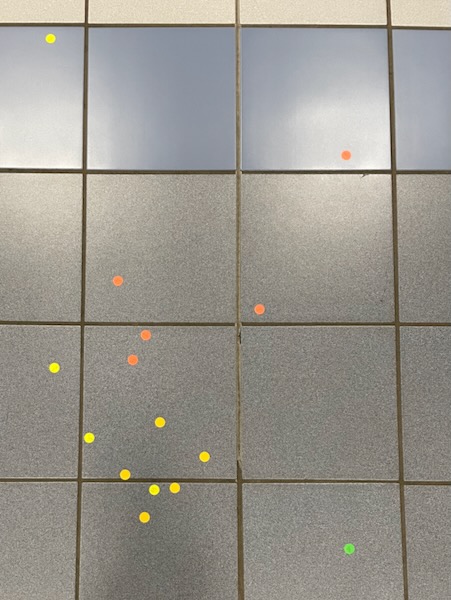
Students have the opportunity to test their catapults individually in the hallway, allowing them to refine their designs through real-world application. The project culminates in a friendly competition, where each student is assigned a color and a letter of the alphabet. Using colored circular stickers, like those found at garage sales, they mark where their pennies land. This contest evaluates their catapults based on distance, accuracy, and consistency, emphasizing the practical application of engineering principles in a fun and engaging way.

Iterative Learning
The 3D-printed penny catapult project is designed to be iterative, encouraging students to continuously improve their designs. After the initial build and testing phase, students are required to create an updated version of their catapult, focusing on improving at least one component. Whether it's refining the arm or adjusting the base, this iterative process teaches valuable lessons in design optimization. It often requires multiple prints to achieve the perfect fit for the metal axle and the penny, ensuring a snug hold and the correct release point. This process introduces students to the practical challenges of engineering, from achieving a good fit to understanding projectile motion. While the exploration of projectile motion is kept basic, it provides an excellent foundation in physics, adding another layer of learning to this introductory project.

Grading and Evaluation
The evaluation of the 3D-printed penny catapult project is as multifaceted as the project itself. Roughly 40% of the grade is based on the physical prototype and the design process, emphasizing the importance of hands-on skills and iterative improvement. Another 40% comes from a written reflection, where students articulate their learning experiences, challenges faced, and insights gained throughout the project. The remaining 20% is based on performance, with categories such as best for distance and best for accuracy, encouraging a competitive yet educational spirit among students. This comprehensive approach to evaluation ensures that students are recognized for both their practical skills and their ability to reflect on their learning journey.
