
The choice of prototyping materials significantly influences students' understanding of problem solving and design methods. I've developed a structured approach that guides students through multiple materials with increasing resolution - from quick, low-detail aluminum foil concepts to more refined chipboard models, and ultimately to high-resolution 3D printed prototypes. This progression allows students to explore design ideas with increasing fidelity and detail. My approach is influenced by the work of IDEO and the Stanford d.school, leaders in design thinking methodology.
The Prototyping Journey: From Low to High Resolution
Aluminum Foil: The Low-Resolution Starting Point
I begin our prototyping journey with aluminum foil, representing the lowest resolution in our spectrum. This versatile material offers several advantages:
- Inexpensive and readily available
- Can be cut without tools and sculpted by hand
- Accepts markings from permanent markers
- Easily dispensed, ensuring each student gets roughly the same amount
- Allows for quick 3D visualization of ideas
- Low personal investment, encouraging rapid ideation
Aluminum foil prototypes embody the essence of brainstorming. Their quick formation time and low resolution allow students to generate and discard ideas rapidly, fostering a creative, judgment-free environment.
Chipboard: Increasing the Resolution
As ideas begin to take shape, I transition students to chipboard - similar to the back of a notepad. This material, which can be purchased in bulk from Uline, offers new possibilities and higher resolution:
- More durable than aluminum foil
- Can be cut with scissors and maintains its shape
- Accepts various marking tools (pencils, markers)
- Can be hole-punched and glued
- Has a grain orientation, offering both stiffness and flexibility
Chipboard requires more time and effort, naturally increasing students' personal investment in their designs. This progression encourages more thoughtful decision-making in the design process. When jumping from aluminum foil to chipboard, students can truly start building functional prototypes with increased detail and resolution.
Additional Materials
Further we go into the process, I provide a greater range of prototyping materials such as straws, wood dowels, string, fishing line, paper clips, popsticle sticks, card stock and manila folders.
Curriculum Integration: The Pringles Challenge
To illustrate how these materials are used in practice, let's examine my Product Design course's Pringles Challenge:
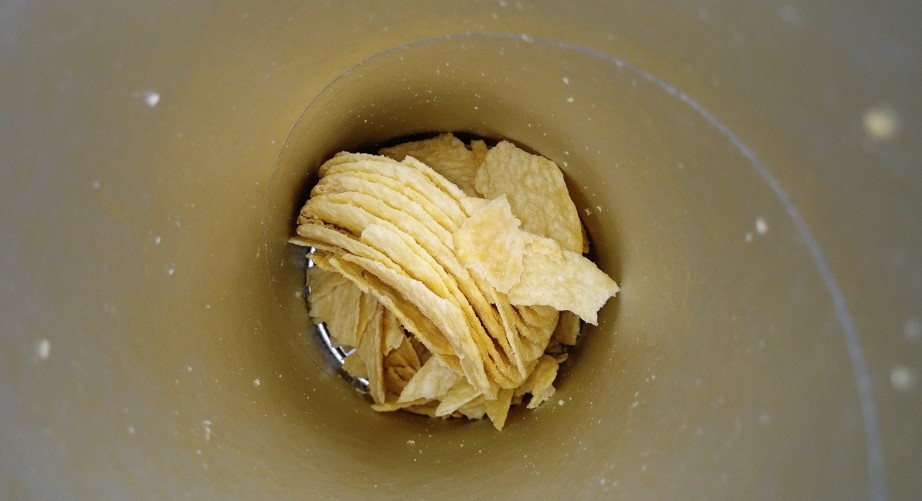
- Problem Framing: Students are shown an image of the bottom of a Pringles can, prompting them to identify potential design issues.
- "How Might We..." Statements: Students generate multiple problem-solving prompts (typically around a dozen), such as "How might we keep Pringles fresh after opening?" or "How might we make it easier to share Pringles with friends?"
- How might we make them cheaper?
- How might we make them more shareable?
- How might we get more flavor?
- How might we get all the crisps out easily?
- How might we keep them from breaking?
- How might we see how many Pringles are left?
- How might we make it easier to transport?
- "We want..." Statements: Students generate multiple (typically 4-7) statements to state the ultimate impact they're trying to have.
- Constraints: The class collaboratively lists design constraints (general limits imposed on a design project such as deadlines, budgets, materials, or manufacturing processes). This is a good point to review the seven resources of manufacturing: knowledge, time, money, people, space, equipment, and materials.
- Criteria: The class collaboratively lists potential evaluation criteria.
- Sketching: Students create three labeled sketches, shared only with the instructor.
- Aluminum Foil Prototypes: Students create and present quick, low-resolution prototypes to the group.
- Criteria Refinement: Based on group feedback, a weighted criteria table is developed.
- Market Appeal: Will more people buy it? Do people want to buy the product?
- Brand Identity: Is it still identifiable as Pringles?
- Economic Factors: Can it be produced at the same price or less? Can production volume stay the same or improve?
- Product Integrity: Does it result in fewer broken chips? Can it protect the crisps?
- User Experience: Is it easy to use? How easy is it to grab the last crisp? Is it comfortable to hold?
- Functionality: Can it be resealed? Can it hold the same number of crisps, if not more?
- Manufacturing Considerations: Can it be manufactured consistently? Can it be palletized the same way?
- Product Preservation: Does it keep Pringles fresh?
- Chipboard Prototypes: Students create more detailed, higher-resolution prototypes using chipboard.
- Weighted Table Evaluation: With the weighted table on the board, students use post-it notes to rank each design based upon the criteria.
In practice, students generate a wide range of "How Might We" (HMW) statements that encourage creative problem-solving. Here are some examples from past Pringles Challenges:
These HMW statements cover various aspects of the product, from manufacturing and cost considerations to user experience and product quality. They serve as springboards for innovative thinking in the next stages of the design process.
Based on group feedback and discussion, students collaboratively develop a set of evaluation criteria. These criteria often include:
These criteria reflect the multifaceted nature of product design, considering not just the end-user experience but also manufacturing, distribution, and marketing aspects. They form the basis for the weighted table evaluation in the next step of the process.
The Power of Sharing Prototypes
Perhaps the most crucial aspect of this process is the sharing phase. When students explain and demonstrate their prototypes to others, is when I see the greatest evolution in their understanding of their own ideas. This peer interaction and feedback loop is essential in driving design improvements and fostering critical thinking skills.
At the end of the entire prototyping process, my students have a good idea of how many parts will be in the assembly, the approximate dimensions of those parts, and how they will interconnect. All this information will be valuable in their future 3D modeling process. They gain insights into which features are critical and which ones are not, as well as which part is going to be the most complex or difficult to 3D print.
Beyond the fact that students can interact with their prototypes and share them with others to gain observations and feedback, the prototyping process forms the foundation for the 3D modeling design process. While I have mixed feelings about allowing students to go straight to 3D modeling and 3D printing (and I'm guilty of that approach myself), I feel it is of critical importance for my students to go through the entire prototyping process and have it as a tool in their toolbox.
I do not see physical prototyping as an outdated process. Instead, I see it as a process with distinct intention and purpose. It establishes situations to gain knowledge quickly - and this knowledge isn't primarily about the solution, but about understanding the real problem they are trying to solve.
The Impact of Material Resolutions
The progression from aluminum foil to chipboard, and eventually to 3D printing, represents a spectrum of increasing resolution in prototyping. Aluminum foil offers the lowest resolution but the quickest ideation. Chipboard increases the fidelity, allowing for more functional prototypes. Finally, 3D printing provides the highest resolution, capturing intricate details and producing functional parts. By exposing students to this full spectrum, they learn to choose the appropriate prototyping method based on their current stage in the design process and the level of detail required.
By structuring my curriculum to progress through this increasing of resolutions, from low-resolution materials like aluminum foil to more involved materials like chipboard, and ultimately to high-resolution 3D printing, I encourage students to balance rapid ideation with thoughtful refinement. This approach not only teaches practical prototyping skills but also instills a deeper understanding of the iterative nature of the design process and problem-solving in general.
Note: For this specific Pringles Challenge project, we stop after the chipboard prototyping /weighted table evaluation stage. The next unit in the curriculum focuses on introducing 3D modeling and 3D printing concepts, building upon the foundational prototyping skills developed in this challenge.